DIY Raspberry Pi Internet Weather Station: Step-by-Step Guide
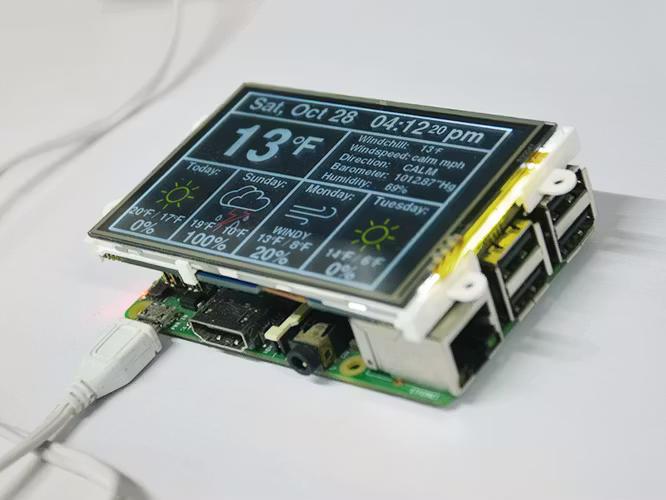
Ever wanted a dedicated weather station that looks sleek on your desk and provides real-time data? By combining a Raspberry Pi with a 3.5” LCD, you can build a professional-grade weather monitor.
In this guide, we’ll break down the project originally shared by 4DMakers on Hackster.io, providing you with the setup instructions and the Python code to get it running.
The Setup: Hardware You’ll Need
-
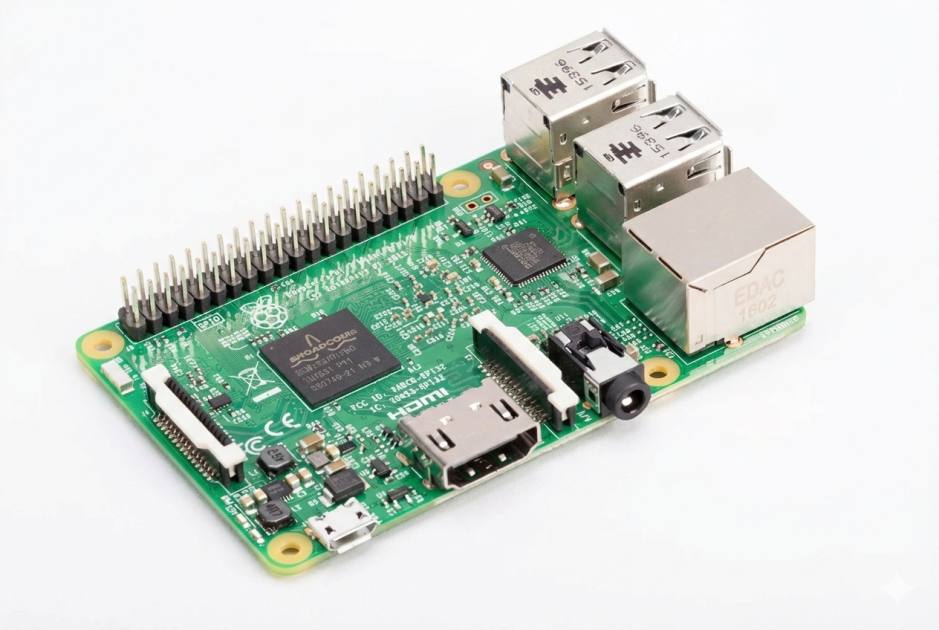
Raspberry Pi 3 or 4
-
4DPi-35 LCD Display (3.5-inch Resistive Touch)
-
MicroSD Card (Pre-loaded with Raspberry Pi OS)
-
Power Supply
Step 1: Install Dependencies
Open your terminal and install the necessary libraries to handle the weather data and the graphical interface:
sudo apt-get update
sudo apt-get install python-pygame
Step 2: The Python Weather Code
Create a new file named weather.py on your Raspberry Pi. This script uses the Pygame library to create the visual interface and fetches data via the Weather API.
Copy and paste this code into your script:
import os
import pygame
import time
import pywapi # Python Weather API

# Set up the display (Adjust for 4DPi-35)
os.putenv('SDL_FBDEV', '/dev/fb1')

class WeatherStation:
    def __init__(self):
        pygame.init()
        self.screen = pygame.display.set_mode((480, 320))
        self.font_large = pygame.font.Font(None, 80)
        self.font_small = pygame.font.Font(None, 40)

    def fetch_weather(self):
        # Replace 'YOUR_CITY_CODE' with your local code (e.g., USNY0996 for NYC)
        result = pywapi.get_weather_from_weather_com('YOUR_CITY_CODE')
        return result['current_conditions']

    def update_display(self):
        data = self.fetch_weather()
        self.screen.fill((30, 30, 30)) # Dark background

        # Render Temperature
        temp = "Temp: " + data['temperature'] + " C"
        text = self.font_large.render(temp, True, (255, 255, 255))
        self.screen.blit(text, (50, 100))

        # Render Conditions
        status = data['text']
        status_text = self.font_small.render(status, True, (0, 200, 255))
        self.screen.blit(status_text, (50, 180))

        pygame.display.update()

# Run the Station
station = WeatherStation()
while True:
    try:
        station.update_display()
        time.sleep(600) # Update every 10 minutes
    except:
        print("Error updating weather...")
        time.sleep(60)
Step 3: Finding Your City Code
To get your specific weather, visit Weather.com, search for your city, and look at the URL. The code (like USTX0617) is what you need to paste into the pywapi.get_weather_from_weather_com() function in the code above.
Step 4: Making it Realistic (Autostart)
To make this a true "appliance," you want the weather to pop up automatically when the Pi turns on.
-
Open the autostart config:
sudo nano /etc/xdg/lxsession/LXDE-pi/autostart -
Add this line at the end:
@python /home/pi/weather.py
SEO Tips for This Post
-
Slug:
raspberry-pi-weather-station-guide -
Meta Description: Learn how to build a Raspberry Pi Internet Weather Station with a 3.5" LCD screen. Full Python code and hardware setup included.
-
Internal Link Idea: "If you enjoyed this, check out our guide on [Setting up an LCD on Raspberry Pi]."
-
External Link: Source inspiration from 4DMakers on Hackster.io.
Project Visuals

Comments (0)
Please log in to comment
Log In

No comments yet. Be the first to comment!